Are you looking for ways to add a personal touch to your living space? The urge to make your home feel unique and inviting is something we all share. That’s why I put together this list of 29 handmade home decor ideas that can help you unleash your creativity and transform your surroundings. Each idea brings a spark of individuality, turning your home into a reflection of who you are.
If you’re someone who loves DIY projects or simply enjoys crafting with friends, you’re in the right place. These ideas are perfect for anyone who values creativity and originality in their home. Whether you’re a seasoned crafter or just starting out, this collection offers something for everyone. You’ll find projects that fit all skill levels, so you can dive in fearlessly.
What can you expect from this post? Each idea is designed to be fun, practical, and totally achievable. You’ll discover how to create beautiful pieces using materials you might already have at home. Plus, these projects can be great conversation starters when friends come over. Imagine the joy of sharing your handmade creations and the story behind them.
Get ready to explore a variety of styles, from cozy and rustic to modern and chic. These handmade decor ideas will not only elevate your space but also give you a sense of accomplishment. Let’s jump in and start bringing your creative vision to life!
1. Vintage Suitcase Side Table

Transform an old suitcase into a delightful side table that tells a story and brightens your room. Imagine a suitcase with a vibrant pattern or rich leather. It adds a nostalgic touch to your decor. This trend is everywhere on Pinterest, where vintage items are celebrated for their charm and character. Picture placing it next to your favorite chair, creating a cozy reading nook.
To make your suitcase table, start by finding sturdy legs. Wooden legs or sleek hairpin legs work beautifully. Clean the suitcase well, and consider a fresh coat of varnish for a polished finish. You can even add a glass top for a smooth surface, perfect for holding drinks or decorative items. This piece is not just functional; it invites conversation and showcases your creativity.
Here’s how to implement this idea without breaking the bank. Scour thrift stores or garage sales for affordable suitcases that catch your eye. Mix and match legs for a fun, eclectic look that reflects your style. This project fits well with minimalist or eclectic designs, making your living space feel inviting and unique.
• Choose a suitcase with interesting colors or patterns.
• Attach sturdy legs for stability and style.
• Add a glass top for functionality and elegance.
• Use it to store books or magazines for easy access.
Breathe new life into vintage treasures! A suitcase side table not only adds character but also sparks conversations and makes your home uniquely yours. Embrace your creativity with handmade home decor ideas!
2. Mason Jar Herb Garden

Create a lively atmosphere in your kitchen with a delightful mason jar herb garden. This charming project not only adds beauty to your space but also supplies you with fresh herbs for all your culinary adventures! Imagine the fragrance of basil, rosemary, and mint wafting through your home as you cook.
To start, gather a few clean mason jars and fill them with potting soil. Choose herbs that excite you and plant them in the jars. Use small chalkboard labels to name each herb—this adds a personal touch to your garden and makes it easy to identify your favorites. You can place the jars on a sunny windowsill or hang them on a wooden board with wire for a rustic display. The combination of green plants and glass jars creates a lovely visual appeal that will brighten up any room.
Looking for tips? Here are some straightforward ideas to help you get started. This project is budget-friendly, making it perfect for those who want a stylish yet affordable decor option. Plus, it beautifully fits into various design styles, from farmhouse to modern. With your herb garden, you’ll not only enjoy the aesthetic but also elevate your cooking with fresh flavors.
• Add small rocks at the bottom of the jars for drainage.
• Rotate your jars every few days to ensure even sunlight.
• Choose a mix of herbs for a vibrant look and taste.
• Place jars in areas where you frequently cook for easy access.
With a mason jar herb garden, your cooking will become more enjoyable, and your kitchen will feel even more inviting!
Mason Jar Herb Garden
Editor’s Choice
![Wide Mouth Mason Jars 16 oz [5 Pack] With Mason Jar Lids and Bands, Maso...](https://m.media-amazon.com/images/I/81jo+KgW1yL._AC_UL320_.jpg "29 Handmade Home Decor Ideas That Show Your Creativity 3")
Wide Mouth Mason Jars 16 oz [5 Pack] With Mason Jar Lids and Bands, Maso…

Back to the Roots 100% Organic Potting Mix (Value 12 Quart) | Premium Bl…

20PCS Wood Chalkboard Plant Tag, Gardening Plug-in Plant Identification …
3. Upcycled Wooden Pallet Bench

Imagine turning old wooden pallets into a charming bench that adds character to your home or garden. This upcycled project not only helps the environment but also gives you a unique seating option. Picture a rustic bench, perhaps painted a soft blue or classic white, sitting proudly on your porch or in your living room. Trends on Pinterest show that these benches are all the rage, bringing warmth and creativity to any space.
To get started, first, gather a few sturdy pallets. Sand them down to eliminate any rough edges, making them safe and comfortable. Stack the pallets to your desired height and secure them with wood screws for stability. Feeling adventurous? Add a splash of color to match your decor. Once your bench is assembled, throw some cozy cushions on top. This simple touch creates a perfect spot for relaxing or enjoying your morning coffee. Plus, you can use the bench for storage—just lift the top layer to tuck away blankets or outdoor gear, making it both stylish and functional.
Here are some practical tips for your upcycled wooden pallet bench:
Use weather-resistant paint if you plan to keep it outdoors.
Add wheels to the bottom for easy movement.
Choose colorful cushions to brighten up the space.
Place it near plants to enhance your outdoor vibe.
With these ideas, you’ll create a cozy and inviting area that feels just right for lounging or entertaining friends. Enjoy your creative journey!
Upcycled Wooden Pallet Bench
Editor’s Choice

ENYKE Ball Caster Wheels, 1.5-inch Small Casters for Furniture, Swivel F…
4. Glass Bottle Vases

Turn those empty glass bottles into beautiful vases that express your style and creativity! This DIY project is simple and gives you a chance to show off your artistic flair. Plus, it’s an eco-friendly way to brighten up your home.
Start by gathering a mix of glass bottles. Look for old wine bottles, soda bottles, or even charming mason jars. Once you’ve collected your treasures, clean them up and peel off any labels. You can paint them with glass paint for a splash of color, or leave them clear for a timeless look. These unique vases can hold fresh flowers, dried blooms, or even twigs for a rustic vibe. Arrange them on your dining table or mantel for a stunning centerpiece that reflects your personality.
To make your vases even more special, try these creative tips. You don’t need to spend a lot of money; this project is budget-friendly and can be done with items you already have. Group vases of different heights and widths together to create visual interest. Wrap the necks of your bottles with twine or lace for added texture. This simple touch makes everything feel more inviting and warm.
Here are some fun ideas to enhance your glass bottle vases:
– Wrap twine or lace around the neck for texture.
– Choose bottles of different heights for visual appeal.
– Add candles in some bottles for a cozy glow.
– Mix colors and styles for a playful display.
With these ideas, your home will feel personalized and full of charm!
Glass Bottle Vases
Editor’s Choice

Colorful Acrylic Glass Paint Set with 6 Brushes, 1 Palette, 12 Colors St…

PerkHomy Natural Jute Twine 600 Feet Long Twine String for Crafts Gift W…

5. Fabric Scrap Wall Art

Create a stunning piece of wall art using leftover fabric scraps. This fun project not only showcases your creativity but also adds a personal touch to your home. Imagine bright colors and unique textures coming together on your wall. You can mix and match old clothes, fabric remnants, or even unused pieces from past crafts. This style is trending on platforms like Pinterest, where DIY enthusiasts share their colorful creations.
Gather your fabric scraps and cut them into different shapes—think fun circles, bold squares, or even funky triangles. Arrange them artfully on a canvas or sturdy cardboard. Use fabric glue to secure each piece in place. You can frame your creation for a polished look, or hang it directly on the wall for a casual vibe. Either way, this art piece will brighten your space and spark conversations about your creative journey.
Here’s how to get started without breaking the bank. Look around your home for fabric scraps you no longer use. You can find unique textures and patterns that add depth to your creation. This method aligns beautifully with various decor styles, from modern to bohemian, making your space feel inviting and uniquely yours.
• Gather scraps from old clothes or craft projects
• Cut shapes like circles or squares for variety
• Arrange the pieces on your canvas before gluing
• Add embellishments like buttons or beads for flair
This project is perfect for anyone looking to express their style while giving new life to old materials. Enjoy the process, and let your creativity shine!
6. Upcycled Window Frame Mirror

Breathe new life into an old window frame by transforming it into a beautiful mirror. This project adds vintage charm to your home while serving a practical purpose. Imagine how stunning it would look as a statement piece in your entryway or bedroom, reflecting light and creating a welcoming atmosphere.
Start by hunting for a window frame at local thrift stores or salvage yards. Look for a sturdy frame that complements your space. Remove any existing glass, and take the time to clean it thoroughly, getting rid of dust and peeling paint. Then, visit a craft or home improvement store to find a mirror cut to fit your frame’s dimensions.
Once you have your mirror, secure it in place using mirror adhesive or clips. Hang it on your wall, and enjoy how it combines art with function. Plus, you can personalize the frame by painting or staining it to match your existing decor. This DIY mirror can elevate your home’s style effortlessly.
Here are some tips to make the most of your upcycled mirror:
Choose a frame with unique details for added character.
Add hooks at the bottom to hang accessories or decorative items.
Experiment with different placements to reflect natural light beautifully.
Consider a cohesive color palette that complements your room’s decor.
This upcycled window frame mirror project is not only budget-friendly but also allows you to showcase your creativity. It’s a perfect way to make your space feel more personal and inviting, making it a project you’ll love for years to come.
7. Reclaimed Wood Shelves

Transform your living space with charming reclaimed wood shelves. These shelves not only offer practical storage but also infuse your home with a warm, rustic vibe. Imagine wood with rich textures and natural grains, perfect for displaying your favorite books or beloved plants. With their unique character, these shelves stand out in any room, making them a trendy choice for those looking to personalize their decor.
To create your own stunning shelves, start by sourcing reclaimed wood from old pallets, barn doors, or even discarded furniture. Once you have your pieces, cut them to your desired lengths and sand down any splinters or rough edges. Give them a fresh look by staining or painting the wood to match your decor theme—think deep browns for a classic feel or bright whites for a modern touch. Finally, install sturdy brackets for support and secure them to your walls. The result? A beautiful display that tells a story and reflects your personal touch.
Here are some easy tips to get started:
Vary sizes and placements to create visual interest.
Choose metal brackets for an industrial flair.
Add greenery alongside your decor for a fresh touch.
Mix different wood finishes to enhance depth and texture.
These reclaimed wood shelves are an affordable way to elevate your home. They fit perfectly into various styles, from farmhouse chic to modern minimalism. Embrace your creativity and let these shelves make your space feel cozy and inviting. Happy decorating!
Reclaimed Wood Shelves
Editor’s Choice

LEOPO 12 inch Shelf Brackets 6-Pack ,1/5 inch Thick Heavy Duty Industria…

Varathane Premium Fast Dry Wood Stain, Half Pint, Dark Walnut

8 Pack Sanding Sponge, Sanding Blocks 60/80/120/220 Grit Assortment, San…
8. Knit or Crocheted Throw Blankets

Transform your living space with cozy, handmade knitted or crocheted throw blankets. These delightful pieces not only add warmth but also let your personality shine. Choose yarn colors that blend seamlessly with your existing decor. Popular options include soft neutrals or bold hues that make a statement. As seen on Pinterest, mixing textures and patterns can create a stunning focal point in any room.
To start crafting your throw, pick out a soft and durable yarn. Look for budget-friendly options at local craft stores or online marketplaces. There are patterns for every skill level, from simple stitches for beginners to more intricate designs for seasoned crafters. Remember, your throw will not just be a piece of decor; it will also be a cozy companion for chilly evenings or a vibrant accessory to your space.
Here’s how to make your throw special:
Choose a yarn blend that feels soft against your skin.
Select colors that harmonize with your room’s palette.
Incorporate fun textures, like chunky yarn or lace patterns.
Add tassels or fringe for a trendy touch.
With just a bit of effort, your knitted or crocheted throw will become a cherished part of your home. It’s perfect for snuggling up with a good book or impressing guests with your handmade flair. Plus, every time you see it, you’ll feel a sense of pride in your creativity!
Knit or Crocheted Throw Blankets
Editor’s Choice

Lion Brand Yarn Feels Like Butta Yarn, Velvety-Soft Yarn for Crocheting …

Crochet Hooks 12 Sizes Crochet Hook Set, 51 Pack Yarn Crochet Kit for Be…

Floral Throw Blanket Big Flower Pattern Soft Cozy Warm Fuzzy Fluffy Micr…
9. Upcycled Tin Can Lanterns

Create enchanting upcycled tin can lanterns that light up your outdoor spaces and show off your creativity. This fun project is not only budget-friendly but also allows you to express your style with unique designs.
Start by gathering some old tin cans. Rinse them out and peel off any labels. Fill each can with water and place them in the freezer overnight. This step keeps the can sturdy while you add your artistic touch. Once frozen, take the can out and gently tap holes into it using a hammer and a nail. You can create your own patterns—stars, hearts, or even spirals—allowing light to shine through in delightful ways.
Let the ice melt and dry the can completely. You can paint the exterior with bright spray paint for a pop of color or leave it in its original silver for a rustic vibe. Insert a tea light or LED candle to create a warm glow. Hang them from trees or place them on tables to set a cozy atmosphere, perfect for summer nights or backyard gatherings.
Here are some tips to get the most out of your lantern-making experience:
Experiment with patterns for different lighting effects.
Add color with spray paint for a lively touch.
Secure your lanterns with decorative wire or twine for added charm.
Mix sizes and shapes for a dynamic display.
These lanterns not only brighten your space but also spark conversations. They are a creative way to recycle and beautify your home. Enjoy the process and let your imagination shine!
10. Personalized Photo Frame Collage

Create a stunning personalized photo frame collage to showcase your favorite memories. This eye-catching project not only highlights the moments you cherish but also adds a touch of your unique style to your walls. Imagine a wall filled with photos that tell your story, making your space feel warm and inviting.
Start by collecting an array of picture frames in various sizes and styles. You can paint them in a matching color for a polished look or leave them as they are for a fun, eclectic vibe. Consider soft pastels or bold colors, depending on your room’s theme. Arrange your selected photos on a large piece of cardboard or directly on the wall to find the perfect layout before hanging them up. Pinterest is buzzing with ideas for these collages, making them a trendy option for modern homes.
To bring your collage to life, think about adding decorative elements. Incorporate small shelves to display trinkets or mix in wall art to create depth. You can even string fairy lights around the frames for a whimsical touch. This not only personalizes your space but also creates a cozy atmosphere perfect for entertaining or relaxing.
Here are some tips to enhance your personalized photo frame collage:
– Choose different frame styles for a fun and varied look.
– Add quotes or art pieces between the photos for extra flair.
– Consider using washi tape for a creative border around your photos.
– Incorporate string lights to add a warm glow to your display.
With these ideas, your personalized photo frame collage will not only be a beautiful decoration but also a heartfelt reminder of your cherished moments. Enjoy the process of making your space uniquely yours!
Personalized Photo Frame Collage
Editor’s Choice

Brightown 12 Pack LED Fairy Lights Battery Operated String Lights – 7ft …
11. Twine-Wrapped Vases

Turn ordinary vases into stunning decor pieces with twine-wrapping! This DIY project adds a cozy, rustic vibe to your home. Picture a simple glass jar transformed into a charming centerpiece, or a plain plastic container dressed up in natural fibers. You’ll find inspiration for these twine-wrapped wonders all over Pinterest, showing how easy it is to infuse warmth and creativity into your space.
To make your own twine-wrapped vases, start with a clean container. Use hot glue to secure the twine at the bottom of the vase. Then, wrap the twine around the vase tightly, applying glue every few inches to keep it in place. Continue this process until the entire vase is covered, leaving the top open for flowers. These versatile containers work beautifully for fresh blooms, dried arrangements, or even as candle holders. Imagine them adorning your dining table or brightening up your mantle, adding that perfect touch of homemade charm.
• Experiment with different twine thicknesses for unique texture.
• Add embellishments like beads or small flowers to personalize your design.
• Mix and match various sizes for an eye-catching display.
• Use these wrapped vases for seasonal decor changes throughout the year.
With just a little creativity, you can create beautiful, rustic decor that reflects your unique style. This project is not only budget-friendly but also a fun way to unleash your artistic side. Enjoy the satisfaction of making something beautiful that brightens your home!
12. Painted Rock Garden Decor

Add a splash of fun to your garden with painted rock decor! This creative project invites everyone—from kids to adults—to express their artistic side while brightening up any outdoor area. Imagine vibrant stones scattered among your flowers, each telling a little story through color and design. Whether you paint cheerful ladybugs or inspiring quotes, these rocks can bring joy to your space.
To start, gather some smooth, flat stones from your garden or a nearby park. Clean them thoroughly to ensure the paint sticks well. Once they are dry, grab some outdoor-friendly paints and brushes. Think about using bright colors or earthy tones that match your garden’s vibe. Pinterest is buzzing with ideas for designs, from whimsical creatures to elegant mandalas. Let your imagination lead the way!
When you’re ready to display your creations, place them throughout your garden or flower beds. They can serve as playful markers for your plants or simply add a delightful pop of color. Not only does this project enhance the beauty of your outdoor space, but it also fosters creativity and offers a wonderful way to spend time with family and friends.
Here are some tips to help you get started:
Use outdoor paint to ensure your designs withstand the weather.
Seal your rocks with a clear coat for extra protection against rain and sun.
Encourage friends or family to join in for a fun group activity.
Choose a variety of shapes and sizes for a more dynamic garden display.
With painted rocks, you’re not just decorating; you’re creating cherished memories in your garden. Enjoy this delightful project and watch your creativity bloom!
13. Upcycled Ladder Bookshelf

Transform an old wooden ladder into a stunning bookshelf that reflects your personality. This project is not just functional; it brings a charming vintage vibe to any room. Imagine a rustic ladder, perhaps painted in a soft pastel or left in its natural wood state, leaning against your wall. Pinterest is buzzing with ideas like these, showcasing how a simple ladder can become a focal point in your home.
Start by hunting down a sturdy ladder. Check your garage or visit a local thrift store for great finds. Once you have your ladder, give it a good cleaning and sand it down to prepare for its new role. If you’re feeling creative, paint it a bright color or keep it natural for a warm look. Position it against a wall and use the rungs to display your favorite books, plants, or decorative items. You may even want to add baskets on the lower rungs for extra storage. This approach not only saves space but also adds a unique touch to your décor, making your room feel cozy and inviting.
Here are some helpful tips to get you started:
Choose a ladder that fits your space. A tall ladder works great for larger rooms, while a shorter one suits smaller areas.
Add decorative brackets to secure the ladder and prevent it from tipping over, especially if it’s tall.
Mix in decor elements like photos or small plants between books for a lively display that catches the eye.
Anchor the ladder to the wall if you’re worried about stability, especially in busy areas of your home.
With these steps, you’ll create a beautiful, functional piece that showcases your creativity while enhancing your living space. Enjoy the process and make it truly yours!
14. DIY Chalkboard Wall

Turn any dull wall into a playful masterpiece with a DIY chalkboard wall! This fun project works wonders in kitchens, children’s rooms, or even home offices. It creates an exciting space for creativity and communication. Imagine a wall where you can sketch, leave reminders, or plan meals—it’s like having a giant notepad right in your home!
To start, pick a wall that needs some love. Clean the surface well to ensure the paint sticks. Head to your local hardware store and grab some chalkboard paint. You can apply it using a roller or a brush for a smooth finish. Be patient and let it dry completely before you start doodling. Once it’s ready, grab some colorful chalk and unleash your imagination. Draw fun designs, write motivational quotes, or even keep track of family schedules. This wall not only serves as a creative outlet but also adds a touch of whimsy and personality to your space.
Here are some practical tips to make your chalkboard wall stand out:
Choose a bold color for the chalkboard paint to create a dramatic effect. Black is classic, but deep green or navy can add a modern twist.
Use quality chalk that glides smoothly. Look for chalk markers for vibrant colors that are easy to erase.
Add a frame around your chalkboard area for a polished look. You can use simple wood or even ornate trim for a touch of elegance.
Encourage creativity by inviting family members to add their artwork. This makes it a shared space and strengthens family bonds.
With these tips, your chalkboard wall will not only be functional but also a cherished part of your home. Get ready to inspire creativity and spark joy every time you walk by!
Transform a dull wall into a canvas of creativity! A DIY chalkboard wall invites fun, planning, and endless imaginative expression right at home.
15. Repurposed Vintage Tea Cups

Bring a touch of nostalgia into your home with repurposed vintage tea cups. These charming pieces can serve as delightful candle holders or quirky planters. Imagine a soft candlelight glowing from a beautifully patterned cup or a tiny succulent peeking out from an ornate teacup. These vintage finds often feature floral designs and soft pastels, making them perfect for adding character to any room. Pinterest is buzzing with ideas, showcasing how these cups can transform your decor.
Start your collection by visiting local thrift stores, garage sales, or flea markets where you can find these treasures at affordable prices. Look for cups that are intact—no chips or cracks. For candle holders, simply place a small candle in the cup. If you’re going for a planter, fill it with potting soil and add some small succulents or vibrant flowers. This process is easy and budget-friendly, allowing you to create beautiful decor without spending a lot. Plus, it feels rewarding to give these vintage items a new life, making your space feel warm and inviting.
• Choose cups with unique designs for added charm.
• Group several cups together to create a stunning centerpiece.
• Use them as gifts to add a personal touch to special occasions.
• Place them on shelves or tables for a whimsical decor style.
Let your creativity shine through with these delightful vintage tea cups. You’ll love how they can brighten your home and spark conversations, making your space truly unique.
16. Handmade Wooden Coasters

Create your own stunning wooden coasters to protect your furniture and express your personality. These coasters not only serve a practical purpose but also add a unique flair to your home. Think about using rich, natural wood or painting them in shades that match your decor. You might even want to try fun geometric shapes or trendy hexagons for a modern touch. Pinterest is buzzing with ideas on how to customize them!
To start, cut wood pieces into your favorite shapes and sizes. Sand the edges to prevent splinters. If you love a rustic vibe, leave them unpainted. Or, unleash your inner artist by adding bold colors or intricate designs. Consider using a wood-burning tool to etch patterns that reflect your style. Finish off your coasters with a clear waterproof sealant to keep them looking fresh for years. This simple project makes for great gifts, too, perfect for housewarming parties or special occasions.
• Use reclaimed wood for an eco-friendly option.
• Experiment with shapes like circles or hexagons.
• Mix wood types for a unique look.
• Personalize with colors, patterns, or wood burning.
Making these coasters is not only budget-friendly but also a fun way to spend an afternoon. They can brighten up your coffee table, making your space feel warm and inviting. So gather your materials, get creative, and enjoy the process!
Handmade Wooden Coasters
Editor’s Choice

Craft Culture Wood Burning Tool Pen – Craft Burning Tools for Adults & T…

GE Advanced Silicone Caulk for Kitchen & Bathroom, Clear, 2.8 fl oz Tube…

Rockin’ Wood Real Wood Nail Up Application Rustic Reclaimed Naturally We…
17. Upcycled Glass Jar Candle Holders

Transform your empty glass jars into stunning candle holders that not only brighten your space but also reflect your unique style. This DIY project is a fantastic way to reuse jars from your pantry or recycle glass containers you might have lying around. With a little creativity, you can create beautiful holders that add charm to any room.
Begin by thoroughly cleaning your glass jars to remove any residue or labels. Then, think about adding a decorative touch. You might wrap twine around the neck of the jar for a rustic feel, or choose vibrant glass paint to bring a splash of color. Want to take it up a notch? Add embellishments like beads or dried flowers to make each holder stand out. Pinterest is brimming with ideas for inspiration, so let your imagination run wild!
Once your jars are ready, place tealights, votives, or small pillar candles inside. Group them on a dining table for an intimate dinner or scatter them around your home for an inviting atmosphere. These candle holders not only light up your space but also serve as a personal statement piece!
Here are some practical tips to get started:
Use LED candles for a safer option.
Choose various sizes and shapes for an interesting display.
Pick colors that complement your home decor.
Place some jars outdoors for evening gatherings with friends.
Creating these upcycled glass jar candle holders is not only budget-friendly but also lets your creativity shine. They make your home feel cozy and welcoming, perfect for any occasion!
Breathe new life into your space! Upcycled glass jar candle holders not only illuminate your home but also showcase your creativity. Embrace the art of transformation and let your unique style shine.
18. Handmade Fabric Garland

Brighten your space with a handmade fabric garland! This fun project injects color and texture into any room, making it ideal for celebrations or daily charm. Imagine a burst of colors draping across your wall, adding a cheerful vibe. You can use vibrant fabric scraps, old t-shirts, or leftover quilting materials. Pinterest is full of inspiration for unique patterns and styles that can elevate your home decor.
To create your garland, start by cutting your fabric into fun shapes like triangles or rectangles. Then, simply sew these pieces onto a long piece of twine or ribbon, spacing them out to create a delightful display. Hang your garland over a doorway, across your mantle, or even in a child’s room for a playful touch. This project is not just about decor; it’s about expressing your creativity and showcasing your personality.
Try to involve your family in this crafting adventure. It’s a great way to bond while creating something beautiful together. Plus, it’s budget-friendly! You can find fabric remnants at craft stores or even use clothes you no longer wear. This handmade touch makes your space feel warm and inviting, perfect for hosting friends or enjoying cozy nights in.
• Use colorful scraps for a lively look.
• Choose seasonal fabrics for fun themes.
• Add embellishments like beads or pom-poms for flair.
• Involve your kids for a fun family activity!
19. DIY Flower Pot Painting

Brighten up your space with DIY flower pot painting! This fun project lets you showcase your personality and creativity while adding a splash of color to your plants. Imagine vibrant pots filled with lush greenery, catching the eyes of guests and making you smile every time you walk by.
To get started, grab some plain terracotta or ceramic pots. Make sure to clean them gently, removing any dust or dirt. Choose outdoor or acrylic paint in your favorite colors—think bold reds, soft pastels, or lively greens. You can create simple designs like stripes or polka dots, or go all out with intricate patterns using stencils. Pinterest is full of amazing ideas to inspire you!
Let your painted pots dry completely before adding your favorite plants. Not only do these customized pots breathe life into your indoor or outdoor space, but they also reflect your unique style, making your garden or window sill feel inviting and personal.
Here are some easy tips to make your flower pot painting a success. Start with budget-friendly pots from local craft stores or even thrift shops to keep costs low. Consider mixing different styles and sizes of pots for an eclectic look. This approach not only adds depth but also allows you to play with various colors and designs.
Remember to seal your painted pots with a clear waterproof finish. This step protects your artwork from the elements, ensuring your creations last longer.
• Choose vibrant colors to make your pots stand out.
• Mix different styles for a more interesting display.
• Seal with waterproof finish for durability.
• Group pots together for an eye-catching arrangement.
With these tips, you’ll turn ordinary flower pots into stunning decor pieces that showcase your creativity and brighten up any space!
20. Upcycled Drawer Shelving

Give your home a creative touch by turning old drawers into upcycled shelving. This project not only provides storage but also adds a unique flair to your decor. Imagine bright colors or rustic finishes adorning your walls, making your space feel inviting and personal. Drawers can be sourced from broken furniture or thrift stores, where you can find hidden gems waiting for a new life.
To get started, remove any hardware from the drawers and give them a good sanding. This step prepares the surface for paint or stain. You can choose vibrant hues to make a statement or stick to natural wood for a cozy, rustic vibe. Pinterest is full of inspiring ideas showcasing various color combinations and arrangements, helping you visualize how to incorporate these shelves into your home.
Once your drawers are ready, mount them to the wall using brackets or screws for stability. Position them at different heights for an artistic look. Use the open spaces to display your favorite books, plants, or decorative pieces. This approach creates an eye-catching focal point that gives your room character.
Here are some quick tips to guide your project:
Mix sizes and colors for a playful arrangement.
Add decorative paper inside for a surprise element.
Choose items that match the drawer colors for a cohesive look.
Use brackets for secure mounting and added flair.
This DIY project is not only budget-friendly, but it also allows you to express your style. It’s perfect for adding charm and organization to any room, making your home feel uniquely yours. So grab those old drawers and let your creativity shine!
21. Handmade Wire Art

Elevate your home decor with handmade wire art! This creative project allows you to showcase your personality while adding a stunning visual element to your space. Imagine twisting and bending wire into beautiful shapes that capture attention. Whether you choose geometric patterns, inspiring words, or outlines of your favorite animals, wire art can transform your walls into a gallery of self-expression. You can find wire in various colors and thicknesses at local craft stores. Pinterest is buzzing with these trendy designs, making your home feel uniquely yours.
To get started, gather supplies like different gauges of wire and a pair of pliers. Don’t worry about spending a lot; wire is usually affordable. Begin by sketching your ideas on paper, which helps you visualize the final piece. Once you have a design in mind, shape the wire carefully, twisting ends for safety. Hang your creations as standalone pieces or group them together for a captivating gallery wall. This lightweight decor not only looks great but also brings an artistic vibe to your home, making it feel warm and inviting.
• Choose colorful wire to match your room’s theme.
• Combine wire with wood or fabric for a mixed-media look.
• Play with lighting to create interesting shadows.
• Experiment with different shapes for unique designs.
With handmade wire art, you can add a touch of creativity that reflects who you are. Enjoy the process of making something special for your home!
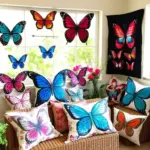
22. Embroidered Pillow Covers

Give your living space a fresh vibe with embroidered pillow covers that reflect your unique style and creativity. These handmade accents not only brighten up your decor but also let you showcase your skills. Imagine snuggling up on your couch with pillows adorned with colorful floral patterns or bold geometric designs. Trending on platforms like Pinterest, these covers can make any room feel more inviting.
To get started, pick some simple pillow covers made from soft fabrics like cotton or linen. Choose vibrant embroidery floss that matches your color scheme. You can find patterns online or create your own! Take your time stitching each design; it’s a relaxing process that adds a personal touch to your home. Once you’re done, simply insert your pillows into the covers and place them on your couch, chairs, or beds. They are perfect for adding warmth and character to your space.
Here are some practical tips to help you create your embroidered masterpieces:
Choose colors that complement your room’s palette for a cohesive look.
Mix different patterns for an eclectic vibe that sparks conversation.
Try using fabric paint for quick designs if you’re short on time.
Experiment with various stitching techniques to create texture and depth.
With these tips, you’ll transform plain pillows into eye-catching decor. Enjoy the process and let your creativity shine!
23. Painted Furniture Makeover

Revive a worn-out piece of furniture with a stunning paint makeover! Not only does this project breathe new life into your home, but it also adds a splash of personality. Imagine a drab old dresser transformed into a chic statement piece that catches the eye.
Start with a piece that speaks to you—a chair, table, or even a nightstand. Clean it well, making sure to remove any hardware. For the best finish, take a moment to sand the surfaces. Choose a color that fits your existing decor or take a risk with a bold, eye-catching shade. Current trends favor soft pastels or rich jewel tones, perfect for creating a cozy vibe.
After painting, think about adding fresh hardware or stencils to elevate your design. A newly painted piece will not only fulfill its original function but also serve as a beautiful focal point in your space, making it feel warm and inviting.
When it comes to painting, here are some handy tips to get started:
Use chalk paint for a lovely matte finish that is easy to distress.
Choose a two-tone design to add depth and interest.
Add a protective top coat to ensure your creation stands the test of time.
Pick stencils or decals for unique patterns that reflect your style.
With a bit of creativity and effort, you can turn a simple piece of furniture into a true work of art. This project is perfect for anyone looking to showcase their personal style while staying budget-friendly.
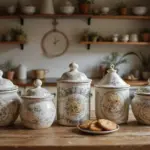
24. Vintage Glass Jar Storage

Transform your vintage glass jars into charming storage solutions that blend style with function. These unique pieces not only help you declutter but also add a touch of personality to any room. Imagine displaying your jars filled with colorful kitchen staples or craft supplies, showcasing the beauty of glass while keeping your essentials handy.
Start by collecting a variety of glass jars in different shapes and sizes. Clean them thoroughly to remove labels and any residue. You can leave them clear for a classic look, or consider painting the lids in bright colors to add some fun. Pinterest lovers often share ideas on how to use these jars creatively, so browse for inspiration to make your displays pop.
When it comes to implementing this project, think about where you want to place your jars. Kitchen countertops, craft rooms, or even bathroom shelves can benefit from their presence. This project is budget-friendly, too—many jars can be found at thrift stores or even repurposed from your pantry. You’ll create a space that feels organized and inviting, perfect for showcasing your creativity.
• Label jars with chalkboard paint for easy identification.
• Mix sizes and shapes for visual interest.
• Fill with colorful items to make them eye-catching.
• Use in various rooms for versatile storage solutions.
25. Driftwood Art

Bring a touch of nature into your home with stunning driftwood art. This decor idea adds a rustic charm while showcasing your creativity. Imagine the beautiful textures and colors of driftwood enhancing your living space. Think about how pieces gathered from a beach or river can transform a bare wall or table into a focal point that sparks conversation.
To start, head outdoors and collect various driftwood pieces. Clean them thoroughly to remove sand and debris. Arrange the wood in a way that captivates the eye. You might create a simple wall hanging by grouping the pieces together. Secure them with glue or a nail gun to keep everything in place. You can even mix in elements like sea glass or shells to add an extra flair. This creates a unique piece that reflects your personal style and love for nature.
Here are some practical tips to make your driftwood art shine. Look for driftwood that has interesting shapes or colors to create depth. Don’t hesitate to experiment with different arrangements before committing to a layout. For a whimsical touch, consider adding fairy lights that twinkle softly. A light coat of varnish can protect the wood while enhancing its natural beauty, making it even more striking.
Try these tips:
– Use varied shapes and sizes for visual interest.
– Choose natural elements like shells or stones to complement.
– Add fairy lights for a magical effect.
– Place your art where it can catch the light.
This driftwood art not only beautifies your home but also brings a piece of the outdoors inside. It’s a wonderful way to express your creativity and make your space feel warm and inviting.
26. DIY Fabric Banners

Brighten up your home with cheerful DIY fabric banners! These colorful decorations add personality and flair to any space. Whether you’re celebrating a special occasion or just want to liven up your everyday decor, fabric banners are a creative and fun solution.
Start by collecting fabric scraps or old clothes in vibrant colors. Cut them into triangles to create a classic banner shape. You can use fabric glue or stitch them together with a sewing machine. Attach the triangles to a long piece of twine for easy hanging. Pinterest is buzzing with ideas on how to customize these, so you’ll find endless inspiration!
For practical tips, choose fabrics that match your theme or season. If you’re on a budget, hit the thrift store for inexpensive materials. This project ties into bohemian and eclectic styles, making your space feel inviting and unique. Plus, you can swap out the fabrics for different seasons or holidays, ensuring your decor always feels fresh and exciting.
• Choose bright colors for a festive look
• Use fabric glue for a quick assembly
• Mix shapes for an eclectic vibe
• Swap fabrics seasonally for a fresh feel
With these easy steps, your home will radiate creativity and warmth, making it a perfect spot for gatherings or quiet evenings. Enjoy the process of making something special!
DIY Fabric Banners
Editor’s Choice

Fabric Glue Permanent, 60 ML Washable Clear Clothing Glue, Super Fabric …

Brother XM2701 Sewing Machine, Lightweight, Full Featured, 27 Stitches, …

150Pcs 4″ x 4″ (10cm x 10cm) Cotton Craft Fabric Bundle Squares,Squares …
27. Personalized Wooden Signs

Creating personalized wooden signs can truly transform your home. These signs add warmth and character to any room. Imagine a sign in your entryway that welcomes guests with your family name or a cheerful “Home Sweet Home” message. Choose wood that speaks to you, whether it’s rustic and weathered or sleek and modern. Stain it a rich color or leave it natural for a different vibe. Pinterest is buzzing with ideas using bright colors and unique fonts, so let your imagination run wild!
To make your sign, start by selecting the right wood piece. Sand the edges to create a smooth surface. You can either stencil your design or use hand-lettering. Try painting or wood burning for added flair. If you’re feeling creative, decoupage with fun paper designs! These signs are budget-friendly and can be made with materials from local craft stores or even leftover wood from other projects. They’re perfect for personalizing your space and make thoughtful gifts for friends and family, adding a personal touch that everyone will love.
• Use outdoor paint for signs in your garden or porch.
• Choose stencils for easy lettering and designs.
• Pick different wood types for varied textures and looks.
• Add a frame to elevate the sign’s style and make it pop.
With these steps, you’ll create beautiful, personalized wooden signs that make your home feel uniquely yours. It’s a fun project that showcases your creativity while brightening up your space!
28. Recycled Book Page Art

Create stunning wall art using pages from old books to bring a touch of literary charm to your home. This fun and eco-friendly project lets you recycle items you might otherwise toss. Imagine transforming those forgotten books into meaningful displays that spark conversation.
Pick pages with beautiful illustrations or intriguing text. You can frame them directly or cut them into fun shapes for a collage effect. Use a large canvas or a piece of reclaimed wood as your base. Attach the cut-outs or framed pages using glue or double-sided tape. This way, your art becomes a unique expression of your personality while celebrating the beauty of the written word.
People love this artistic touch, especially when they mix pages from different books. It creates a diverse and eye-catching display. Plus, think about adding some paint or embellishments to give your artwork even more depth and character. You can achieve an eclectic gallery wall by combining various frame styles, making your space feel warm and inviting.
Here are some practical tips to get you started on your book page art project:
Choose pages with vibrant colors or interesting quotes for impact.
Mix different book genres for a creative twist.
Add paint splashes or doodles for extra flair.
Hang your art in unexpected places for surprise and delight.
This project not only beautifies your space but also makes it feel personal and unique. You’ll love how it honors your love for reading while showcasing your creativity!
29. Upcycled Fabric Scraps Wall Hanging

Bring your walls to life with a stunning upcycled fabric scraps wall hanging! This fun project not only adds color and character to your space but also champions sustainability by turning waste into art. Imagine a vibrant tapestry made from pieces of old clothes or leftover fabric from your sewing projects. You can mix and match patterns and textures, creating a one-of-a-kind piece that reflects your unique style.
Think about using bright colors like yellows and blues or earthy tones like browns and greens. Tie your fabric strips onto a wooden dowel or a branch, and hang it in your living room or bedroom. Pinterest is filled with ideas showcasing this trend, making it perfect for adding a personal touch to your home.
To get started, gather fabric scraps from your closet, thrift stores, or craft supplies. This project is budget-friendly and allows you to express your creativity without breaking the bank. Layer different lengths of fabric for depth. You could even add beads for a touch of charm. This handmade decor piece will surely become a conversation starter, making your home feel warm and inviting.
• Gather fabric scraps from old clothes or leftover materials
• Choose a dowel or branch for hanging your creation
• Mix patterns and colors for a striking visual effect
• Add embellishments like beads or fringes for extra flair
Conclusion

Bringing creativity into your home doesn’t have to be complicated. With these handmade decor ideas, you can transform ordinary materials into unique pieces that reflect your personality and style.
Each project allows for personal expression, ensuring your space feels like home. Dive into one or several of these projects, and let your creativity run wild—your home will thank you for all the love and attention!
Note: We aim to provide accurate product links, but some may occasionally expire or become unavailable. If this happens, please search directly on Amazon for the product or a suitable alternative.
This post contains Amazon affiliate links, meaning I may earn a small commission if you purchase through my links, at no extra cost to you.
Frequently Asked Questions
What Are Some Easy Handmade Home Decor Ideas for Beginners?
If you’re just starting out with DIY home decor, there are plenty of easy and fun handmade ideas to explore! Consider projects like framed fabric art, where you simply stretch your favorite fabric over a canvas or frame.
Another great option is creating personalized candles by melting wax and adding scents or colors. You can also upcycle old jars into cute vases or storage containers, giving them a fresh look while being environmentally friendly!
How Can I Incorporate Upcycled Vintage Decor into My Home?
Incorporating upcycled vintage decor is a fantastic way to showcase your creativity! Start by visiting local thrift stores or flea markets to find unique pieces. Look for items like old wooden crates that can be transformed into shelves or vintage suitcases that can serve as stylish storage.
Don’t forget to paint or refinish these finds to match your interior design style, making them not just unique but also personalized accents in your home.
What Are Some Tips for Creating Unique Home Decorations?
Creating unique home decorations is all about expressing your individuality! One tip is to mix and match different styles, such as pairing modern decor with rustic elements. You can also use unexpected materials like reclaimed wood or metal scraps for a creative twist.
Consider adding a personal touch by incorporating your own artwork or family photos in handmade frames to truly make your space your own.
How Do I Choose the Right Colors for Creative Interior Design?
Choosing the right colors for your interior design can significantly affect the vibe of your space. Start by considering the mood you want to create; for a calm atmosphere, opt for soft neutrals or pastels. If you prefer something vibrant, consider using bold accent colors in accessories or furniture.
Don’t hesitate to use color swatches or online tools to visualize how different shades will look together. Layering colors can also add depth and interest to your handmade home decor!
What Are Some Creative Ways to Personalize Home Accents?
Personalizing home accents can make your space feel truly unique! You can start by creating custom throw pillows with your favorite fabrics or designs. Adding monograms or quotes to wall art is another great way to showcase your personality.
Consider making a memory wall with photos and souvenirs that tell your story, or try your hand at creating hand-painted ceramics that reflect your style. The possibilities are endless when it comes to adding that personal touch!
Related Topics
handmade home decor
upcycled decor
creative accents
DIY home decor
vintage style
personalized decor
budget friendly
easy crafts
unique decorations
interior design trends
sustainable decor
quick projects